
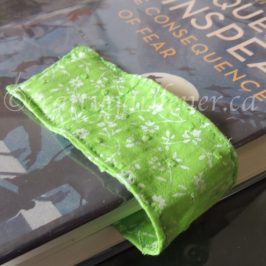
You can quickly and easily turn a piece of silky material into a neck scarf. I don’t know if there is a proper name for these scarves. I’ve hunted but can’t seem to find the answer or a pattern. I’ve seen sort of similar items called nescots, bandana scarfs, neck gaiters and bib scarves. I purchased one years ago at a craft sale and at the time thought they could be easily made and finally I’ve taken the time to make one myself.
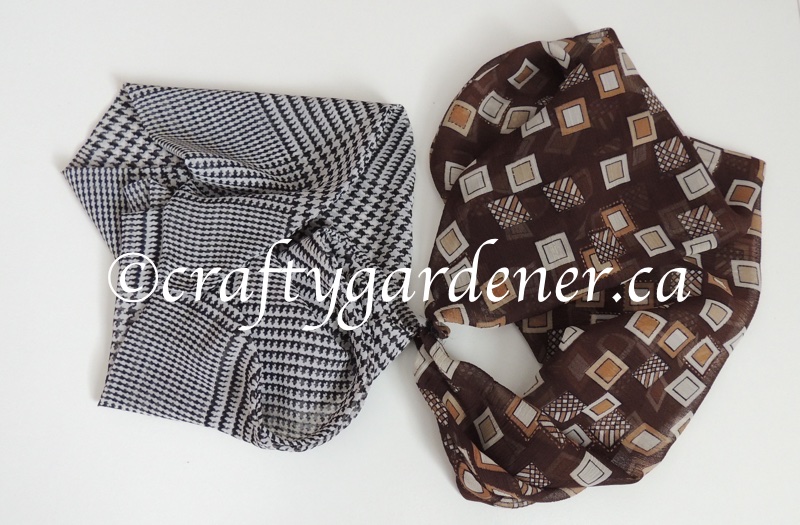
It is made out of a stretched out circle of material, not quite an oval as it is thinner at the ends. I purchased this end cut of material for $2 at Fabricland and so far have lined a bag with it and made this scarf. There is more material left over to make something else.
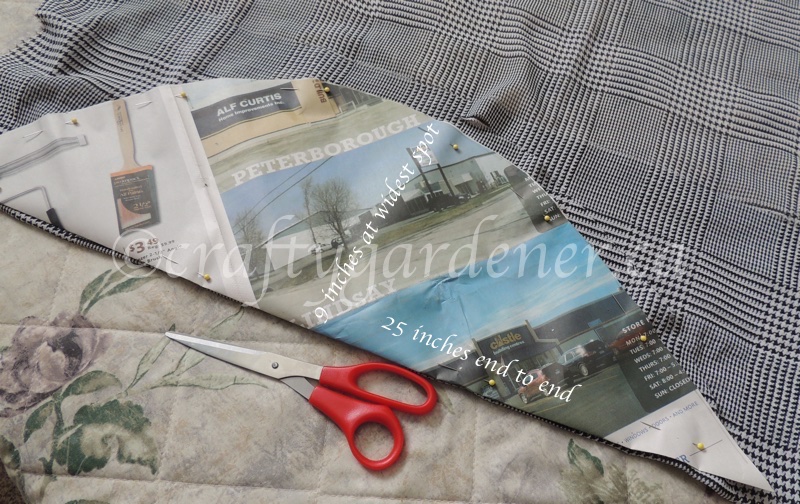
I drew out a pattern on a piece of newspaper, pinned it onto some material, and cut it out. Put the right sides of the material together. In my case it didn’t really matter which was the right or wrong side. I don’t have a pattern for you for the actual shape but it measures 25 inches from point to point and 9 inches wide at the deepest part (includes seam allowance). The photo below shows you the shape I used. You could certainly adjust it to suit yourself.
With one simple row of stitching it was made into an open ended shape. The trick is to leave both ends open as you have to turn it right side out.
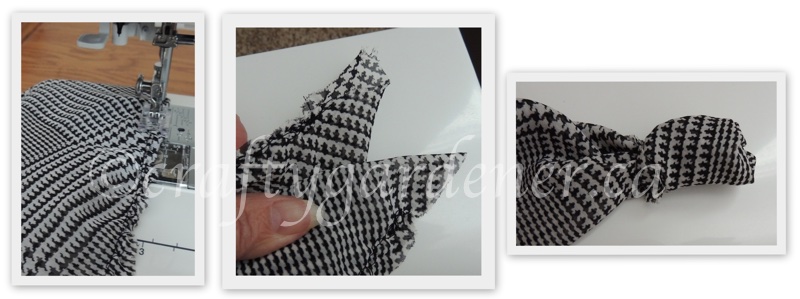
The fiddly part is tucking and pushing all of the scarf through the small opening at one end.
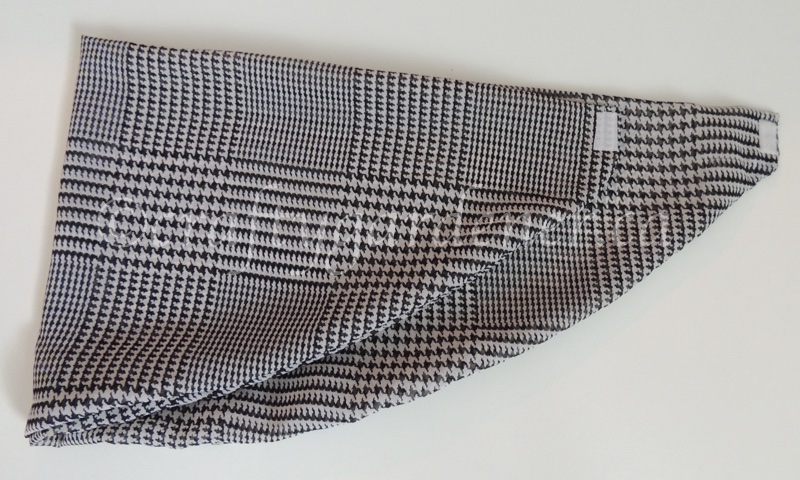
Stitch a small piece of velcro at each end, so that when you put it around your neck it fastens together. I pressed the scarf lightly after turning it, but not enough to crease it as you want it for fall softly around your neck.
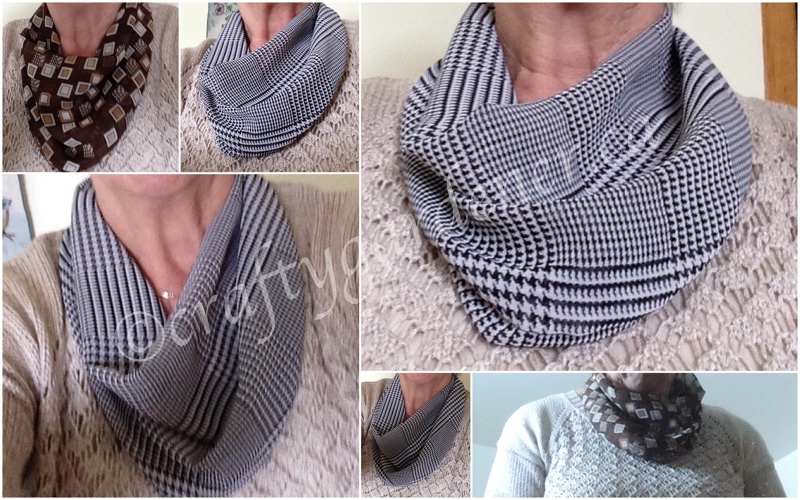
This little scarf took less than an hour to cut our, sew, iron and wear. It is surprising how warm this light weight material can be and it fits over a sweater or under a coat without taking up a lot of room. The velcro makes it so easy to put on and take off. You could use other weights of material as long as they aren’t too bulky. You are only limited by your own imagination.
If by chance you know who designed this type of scarf, what it is called, or if there is a pattern, I’d appreciate knowing.
I’m sharing with Mosaic Monday, The Really Crafty Link Party and Happiness is Homemade.

~Shawls and scarves I’ve made~
- April scarf
- close to you shawlette, browns
- Close to you shawlette, greens
- cowls
- crest of the wave scarf
- fishtail lace scarf
- granny stripe shawl
- knitted neck warmer
- lacy scarf
- lean on me
- life way shawl
- lost souls shawl
- mobius scarf
- multnomah shawl
- one row scarf
- one stitch lace scarf
- sewn neck scarf
- shoulder snuggle
- stacked squares scarf
- summer flies – green
- summer flies – white
- virus shawl
More from the Crafty Side
knit & crochet …. sewing & plastic canvas … patterns … Crafty’s projects … craf-tea ideas … kids crafts … Christmas
Beth
Thanks so much for the idea, it’s exactly what I needed to make, to fill up a top neckline that was too open!
I used your dimensions and it fit me well.
When cutting, I squared off the two ends to fit the Velcro. Also when sewing the edges together, I left a 2-inch gap along one side to turn the fabric to the right side after sewing, rather than pulling it through the pointy ends, since my fabric was a very loose woven and frayed badly.
Crafty Gardener
Hope your neck scarf turned out well Beth. Great idea about leaving a gap in the larger piece to do the turning. I would of done that but didn’t want any top stitching on that part.