
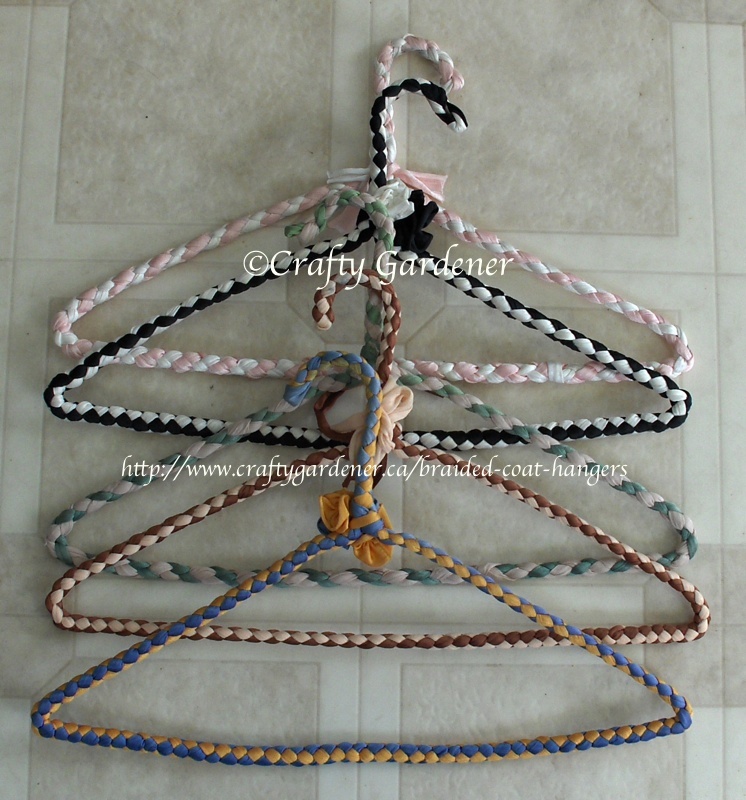
Old crafts are becoming popular again.
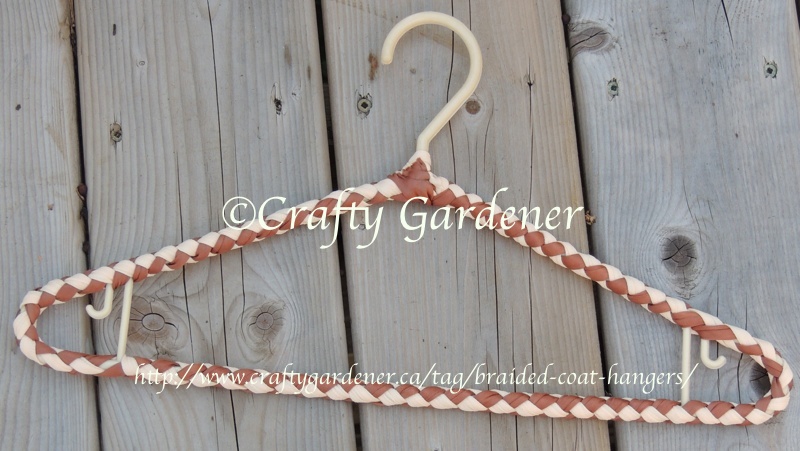
Do you remember the old craft of braiding long strips to make a cover for a wire coat hanger? The original material was Nylotex or Phentex, a stretchy, nylon material. I’m not available in stores, but it does turn up in thrift stores from time to time. You could use long strips of material or even extra wide ribbon.
This has proved to be one of the most popular posts on my site … an old craft that is becoming popular again. I have a pattern available to print that is my version of a pattern shared with me many years ago on a crafting bulletin board. I never knew where the original pattern came from but then a visitor to my site let me know it was originally by Qualicraft.
I did a search and found someone selling that pattern booklet on etsy … and better still this seller was in Canada. Of course I had to have the pattern and cliceked to purchase it right away. The leaflet also includes patterns for slippers, a placemat and a covering for a lawn chair.
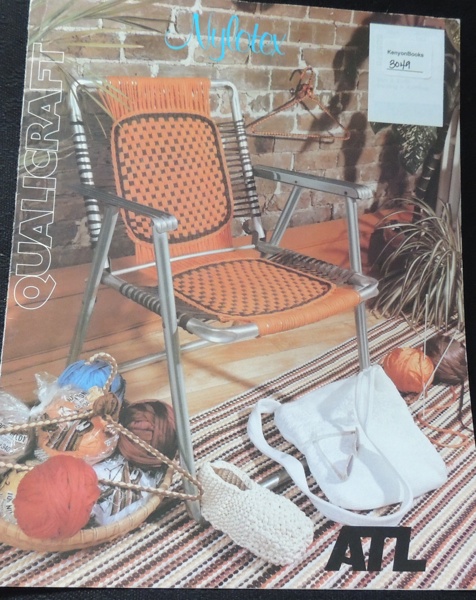
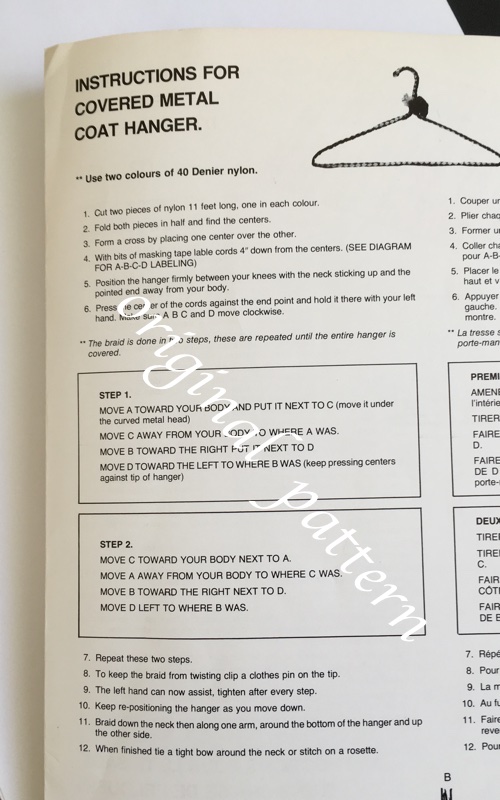
The original pattern is in the image below. Even though out of print, you can still find the original pattern book for sale, you just have to use a search engine to find one. The instructions I use were shared by SusieQ on a crafting bulletin board a long time ago. This is not my original pattern but I did adapted the wording a bit to make it more clear. I hope you can figure it out. If you don’t get it the first time, keep trying, as it does get easier.
Frequently the finished coat hangers turn up in thrift stores and garage sales. Before I had the pattern I tried unravelling one to see how it was done but I couldn’t figure it out.
You use Phentex or Nylotex material strips. Now these are almost impossible to find, though you can pay a small fortune for some on Ebay. I’ve still got a stash of some in limited colours and amounts. Good places to find this are in thrift stores, Freecycle groups or on Kijiji.

Materials:
- 2 strips of material (let’s say pink and beige) — approximately 3.5 to 4 yards long each
- the original material was Nylotex or Phentex
- wire coat hanger
- patience as sometimes getting started takes a few tries
Directions:
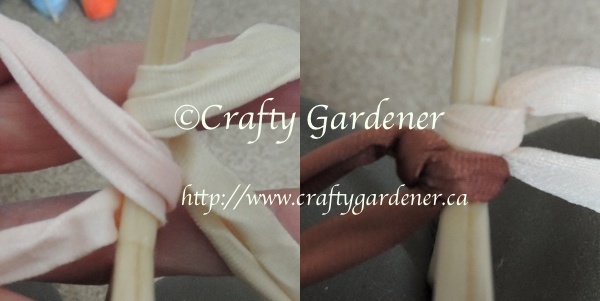
Find the middle of the two strips and put them together as if making a cross. This is the centre that goes on the tip of the coat hanger. Put the tip of the coat hanger in the centre of the “cross”. You now have four strips of material — 2 pink, 2 beige.
Hint: I put the coat hanger between my knees when I do these.
Arrange the 2 strips of one colour (pink)– on one side of the hanger – let’s say left side of the hanger and the beige strips are on the right side.
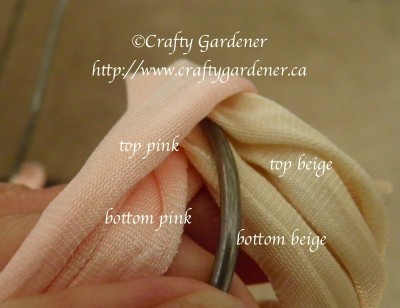
Now look at the strips and place them between two fingers on each hand.
You start with the top strip on one side. — let’s say beige — right side — it is the first one to go down underneath the wire, through the two pink strips on the left side, up and over the wire and becomes the bottom beige strip on the right side.
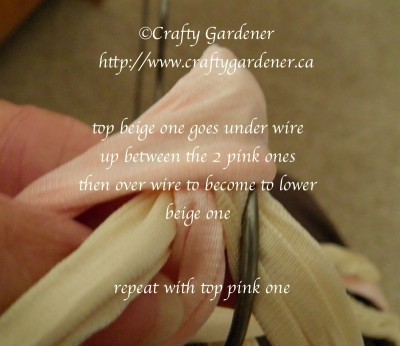
Now take the top pink strip — left side — go under the wire, through the 2 beige strips on the right side, over the wire — that becomes the bottom pink strip on the left.
Go back to the top beige strip and go under the wire, through the 2 pink strips, over the wire and this one becomes the new bottom beige strip.
Go to the top pink strip and do the same thing — and then this one becomes the new bottom pink strip.
Continue “braiding” until you come to the neck of the wire — where the two pieces separate — just continue to braid separately.
When you get all the way around — go up the neck of the coat hanger for a few braids and then tie off.
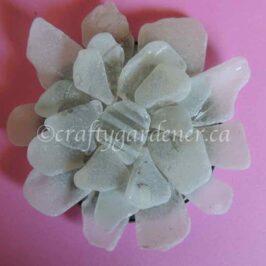
Once you get the hang of braiding with 4 strips the hanger is covered quickly. I usually finish off by making the ends into a little flower, but you could always stitch on an artificial flower or something else to decorate the hanger.
In the second photo above you can see the top beige one just being poked up between the 2 pink ones.
Now take the top pink strip — left side — go under the wire, through the 2 beige strips on the right side, over the wire — that becomes the bottom pink strip on the left. Go back to the top beige strip and go under the wire, through the 2 pink strips, over the wire and this one becomes the new bottom beige strip. Go to the top pink strip and do the same thing — and then this one becomes the new bottom pink strip.
You can say under, between, over and pull as you do it to reinforce the movements. Continue “braiding” until you come to the neck of the wire — where the two pieces separate — just continue to braid separately. When you get all the way around — go up the neck of the coat hanger for a few braids and then tie off.
Now wire coat hangers are getting harder and harder to find. So I thought I would tweak the pattern again and cover a plastic hanger.
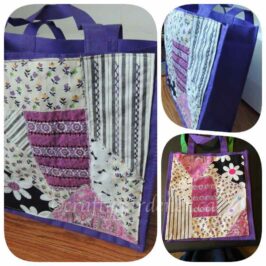
This time I wasn’t going to cover the main hook of the hanger and I also had to work around some little hooks for looping clothing on. But I was up for the challenge and you will be too if you decide to try this. I used the same pattern for the braiding.
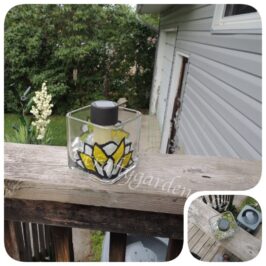
I cut the long strips of material, found the middle and put them around the base of the hook on the hanger, the same colours on each side. Then I decided to knot them in place as nylon on plastic sure can be slippery. You will notice in the photo above I used different colours and that is because I realized the beige one was too short (it was already cut) but I’d already taken the photo. But it is just to give you an idea how to start off. It was hard to hold the strips, focus the camera and get a good shot, so I decided to just leave it that way.
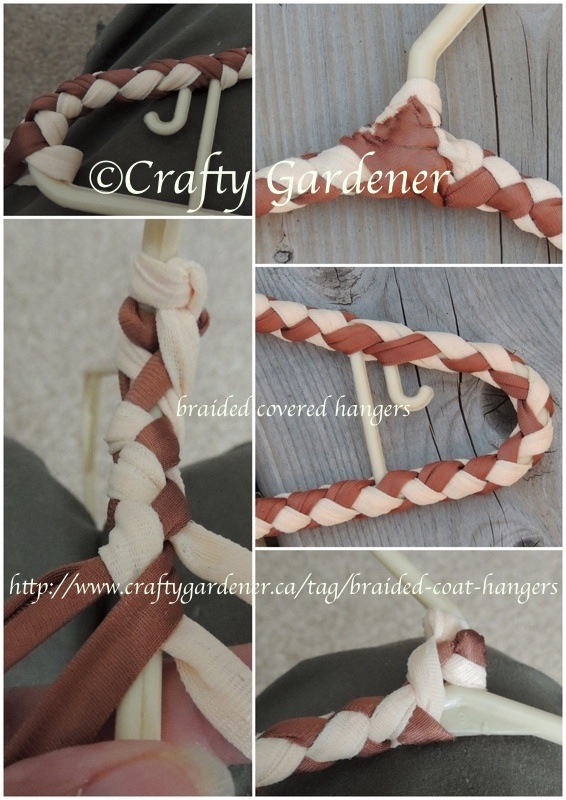
The collage has a close up of the small hook, the start of the braiding, how the strips look while braiding, and the finish of the braiding. At the end I wrapped the material around a couple of times and then stitched it into place. I have wire hangers I did years ago and the knots used to finish it off have started to come undone.
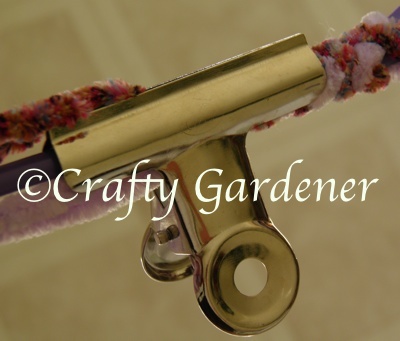
Here is a hint that might work for you if you have to stop the braiding part way through. The nylon strips slip so easily and you can quickly lose track of what you were doing. Put one of the big clips (used for holding paper) right over the spot where you are stopping and it keeps the strips or yarn in place till you are ready to return.
… a new look to an old craft …
It looks great when finished off and I think it is better than the wire hangers as you have the added hooks that they don’t have and it is more sturdy than wire ones.
And then I got to thinking … it is hard to find these nylon strips now so why not use up some chunky yarn I had left over from other projects.
And I came up with this yarn covered braided hanger.
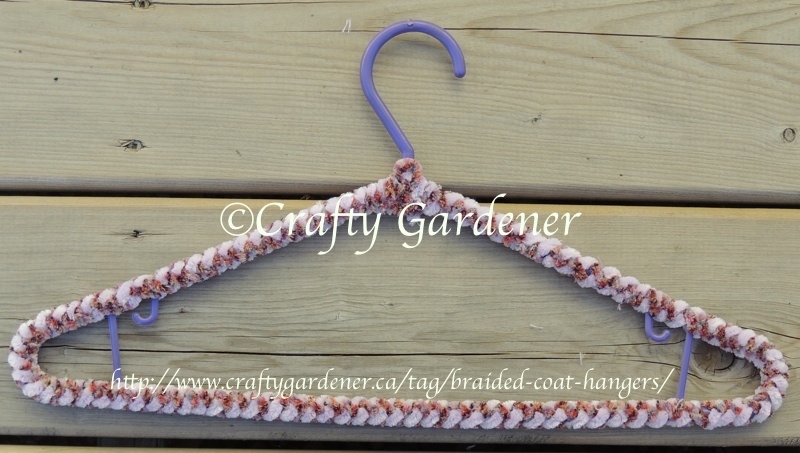
It is lovely and soft and will be perfect for those delicate clothing items. This yarn was Patons Bohemian. You need to make the strips a bit longer as it braids tighter than the material strips.

If you have been trying to find the Phentex or Nylotex material you know it is nearly impossible to find. But here are some solutions that I found while browsing the yarn department.
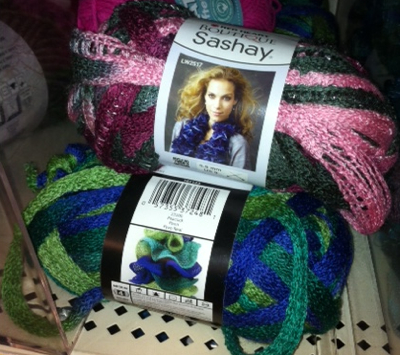
A visitor to my site also recommended a Lion Brand yarn called Fettuccini. This is a yarn made from remnants of material. But these specialty yarns can be expensive. You could also try ribbon or material strips. If you really want to make these covered coat hangers you will surely come up with a substitute.
Good luck in your search for the perfect yarn to use making these covered coathangers.
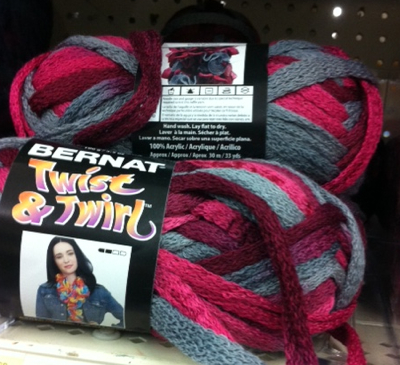
August 2023 edit: While in Dollarama I found this yarn that would be perfect for braided coat hangers. It is certainly worth a try.
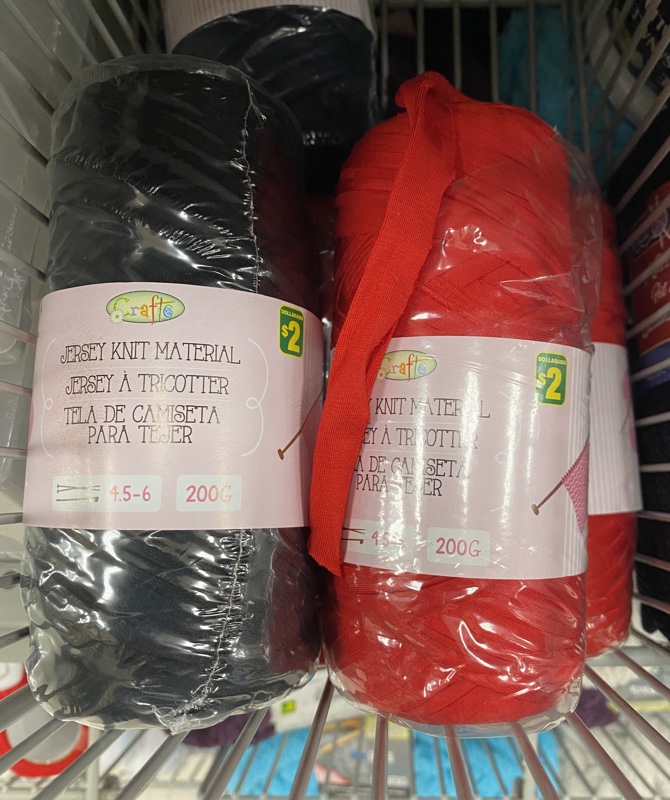
Bringing this post to the top again so other crafters can see the yarn/fabric I found at Dollarama.

Other coat hanger patterns:
- Braided wire hangers
- covered crochet hangers
- crochet covered hangers
- crochet covered hangers with flowers
- fabric covered hangers
- removable crochet covers
- scarf storage
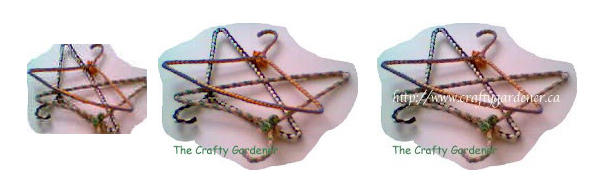
The left thumbnail image was stolen by someone (Kate Plourde) and posted on a craft site as their own, even though her directions are slightly different to mine, the image had my name removed by cutting off the bottom section and reposted to the site with her name underneath with the © symbol. The second image is mine and you can see where the name has been taken off. The site, craftown.com, agreed to remove the image. Thank you very much. I have since added my url through the middle, third image. If people would ask I would willingly give approval to use my images, but taking them, changing them and claiming them for themselves is stealing and against the law. Why do some people feel it is their right to take other peoples images/work, claim it for their own, which eventually spoils it for all the wonderful crafters out there that share?


Lorrie
Old is becoming new again – I think of macrame which also seems to be enjoying a resurgence.
Crafty Gardener
I have been noticing lots of macrame kits for sale at places like Mary Maxim. I had to refresh my macrame knotting skills just the other week as we were making a little wreath at a craft session, thank goodness it came back quickly 🙂
Country Gal
I haven’t seen these in ages not since the 80s . Thanks for sharing . Have a good weekend !
Crafty Gardener
You frequently see the finished items in thrift stores and at garage sales. I’ve seen them popping up a craft sales too. I’ve got a closet full of them !
Marielle
Do you know where I can find phenyex for the crochets
Crafty Gardener
As I started in my post, I have no idea where it can be found, but did offer some suggestions and alternatives. Good luck in your search. Thanks for stopping by.
Margy
I have so many covered hangars my mom made. She had enough for almost her whole closet. I really like the thicker ones on old wooden hangars to hang coats and jackets. – Margy
Crafty Gardener
I’ve got lots too Margy, but it is still amazing how many people are looking for the pattern. Must be nostalgia !
Myrtle
I still have a couple left in my closet. I really like the one you did with chunky yarn..
I see ots of things coming back around. Have a good weekend
Crafty Gardener
I like that one too Myrt, and as the original material isn’t available anymore a great replacement is the chunky yarns.
Regula
Nice. 🙂
Fiona Cambouropoulos
So pretty, it’s a shame to just hang clothes on them! #RealCraftyLinkParty
Julie Cartwright
Great idea Linda I do remember seeing this before and then if you have the old wooden hangers they used to be covered with padded fabric. These old craft ideas always come back which I think is great. Thank you for sharing.
Margie
It’s always interesting when old crafts or styles are fashionable again. Thanks for the blast from the past!
Teresa
These are test. I never thought about making them myself, but now I feel maybe I can. I love original and decorated hangers, they make the closets so much brighter and fun.
Thank you for sharing at The Really Crafty Link Party. Pinned.
wendy
I would have thought you could do this with any fabric? maybe old Tshirts cut into strips?
Crafty Gardener
You sure could use any material strips or even ribbon. Thanks for stopping by for a visit today.
Chas Greener
These are so great! Thanks for sharing on To Grandma’s House We Go!
Lavender Dreamer
I would love to make some of these. I still use some OLD ones and also put pillowcases with a cut out part over winter coats. This is such a great idea! Thanks!
Mariams |Creations
I came on your website by the Handmade Monday party link. I love the idea. Thanks for sharing.
Cheers, Mariam
–Mariam’s Creations recycle & create
Crafty Gardener
Thanks for stopping by for a visit. Enjoy the day.
Linda Maxey
so happy to find the original pattern. thank you. I made these as a child . the metal hangers would leave rust marks on my clothes.
Crafty Gardener
A visitor to my website contacted me with this message,
Back in the day we had a family friend who made hangers for us. He used plastic twine purchased from an agriculture supply store which is used for baling hay. This twine comes in big “spools” that I believe are like a 1000 feet and would be much less expensive than yarn.
Paige
My great great grandmother in Saskatchewan braided plenty of these for me and my sisters when we were just little. She was ukrainian and did not speak any english. I have had them in my closet since I was about 6, and I am now 30.
I found this website searching how to make them myself so that I could hopefully replace all of the boring ones in my closet with these – I have alot more clothes than I did when I was 6! 🙂
Thank you for this! I will definitely be keeping an eye out for some appropriate material now that I know how to make them!
Michelle
Fabulous! Besides being pretty, the braid gives the hanger a little more friction to keep clothes from sliding off. Lovely! Thanks for linking up to Creative Compulsions!
Patricia
My mother and her sister were in their late 80’s and used to cover the wire hangers using old nylons & pantyhose. They had several different patterns they made, some were very thick, others used 2 colors, etc. I’d love to find those patterns and/or just the directions as we didn’t learn this craft when we had the chance.
Meanwhile, we will try your pattern & directions. Thank you so much for posting them, complete with photos!
Peggy
I would love to get my hands on the Nylotex materials again. I use it to hook my rugs.
Crafty Gardener
From a visitor that contacted me:
Hello CG, Thank you for your suggestions on how to weave/cover clothes hangers with something other than Nylotex. My supply is dwindling. My Mother taught me how to do this and I realized long ago that Nylotex had been discontinued, so I bought as much as I could. LOL I am working on a Covid series of hangers and will try to send you a photo when finished. I think you know there are two patterns in the weave; spiral & diamond. I saw most of yours seem to be the spiral. I have started to use fabric glue to keep the starting ‘ribbons’ in place. (getting old!) I find it easier to start in spiral (two ribbons against each other), and then switch at the neck to diamond: same colour, two ribbons on each side. I do not make the little bows that my mother did. I did not pay enough attention for that.
Keep up the good site.
Laura
I have noticed also there are two different patterns. Do you happen to know where I can find the other patten instructions?
Crafty Gardener
The original pattern was difficult to follow so I posted an expanded pattern. I use the same pattern when covering a hanger with a hook as I use with the plastic hangers which don’t cover the hook.
Laura
I have started making some of these using your instructions but I can’t seem to find any instructions to make the little rosettes. Can you point me in the direction?
Crafty Gardener
The rosettes are made by doing a running stitch with needle and thread to the end of the piece, then slide material down and twist into shape, then I do a couple of stitches to hold it into place. Hope this helps you. Thanks for stopping by. Good luck with your braided coathangers. What type of yarn are you using?
Laura
Thanks for your quick reply! I actually stumbled on several packages of Nyloplex at my local thrift store. My daughter and I are slowly making our way through it and adding to the collection of hangers in our closets!
Crafty Gardener
That was a lucky find.
sly
brings back good old memories I did so many of these with my mom and sister you’d think I would remember how.. not! thanks for sharing
Lynne Kirkpatrick
As previous poster “Sly” said – my Mom, sister and I churned out dozens and dozens of these hangars back in the 1980s and 1990s. Here I am 2023, post Covid, and trying to figure out from the Original Pattern how to start the braid. Thank you so, so much, for simplifying it and getting me going again. You would not believe how much of the Nylotex we found squirreled away in my Mom’s house after she passed. I took most of it and continued on making hangars and then I inherited the stuff my sister had taken and never did anything with. I have finished all my Mom’s stash, and from EBay and at thrift shops was able to acquire more Nylotex, but sadly none available any longer. I have a few more sturdy wire hangars to cover with my remaining stash and decided this was the year, while my 77 year old arthritic hands can still do it. Thanks again Crafty Gardener for your postings – so glad you are passing on suggestions of newer yarns that can work to carry on a great craft. I am still using the hangars my Mom made me in the 1980s and not one of them has ever rusted through. A lot of folks back in the day were worried about that – never happened with mine and we spent 20 years as Snowbirds in Florida (from Canada) and the hangars spent time in both places.
Gerry
Thank you so much for sharing this craft. I used to make tons of these for family members in my early teen years. Recently I came across some my mother had and wanted to make them again but after forty five years I couldn’t remember exactly how the braiding part went.