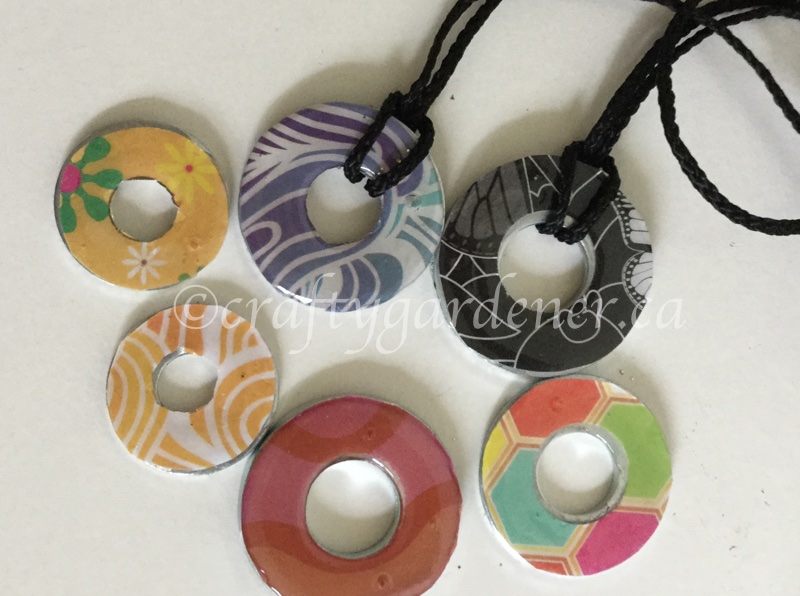
One of my winter projects was to create washer necklaces. I’ve seen this idea in several places on the internet and wanted to try it out.
For this project you need
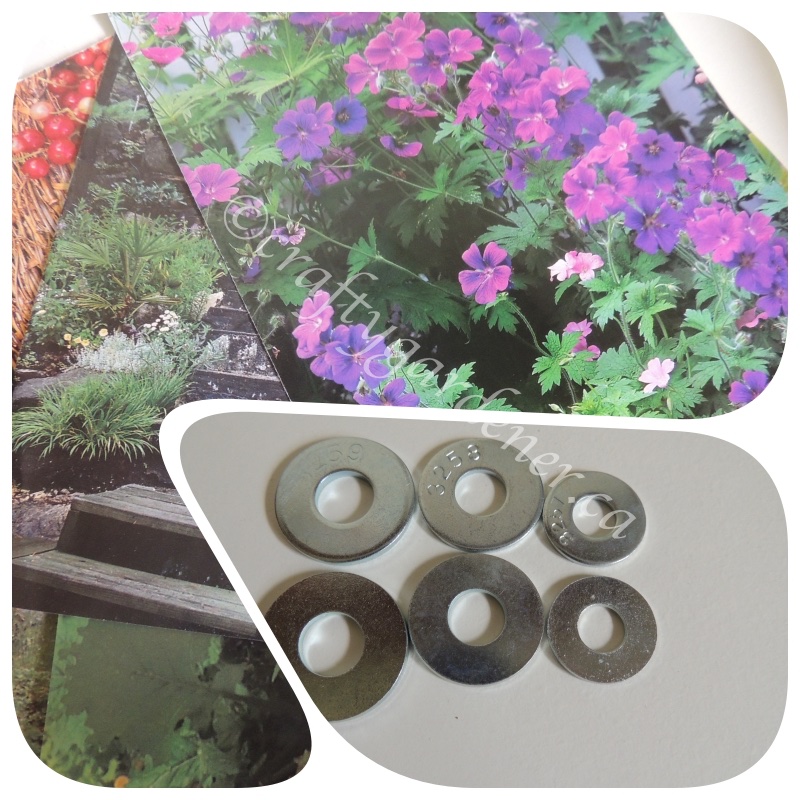
- washers, (purchased from hardware stores),
- patterned paper,
- glue or mod podge,
- scissors,
- a hole punch (not really necessary),
- a dimensional adhesive ( I used Glossy Accents),
- cord.
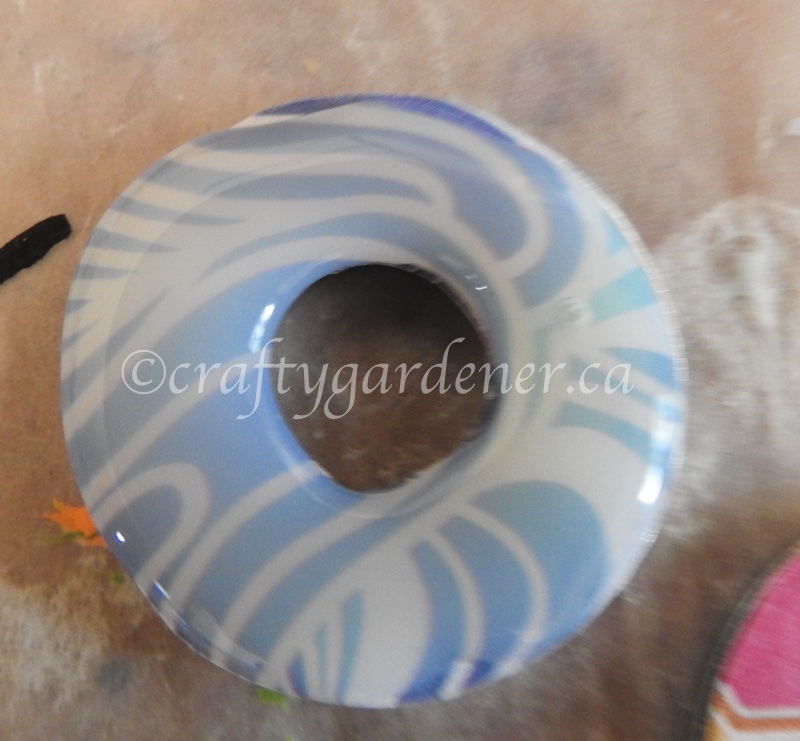
I traced the washer onto some patterned paper. Glossy pages from magazines, scrapbooking paper, and even old photographs work well.
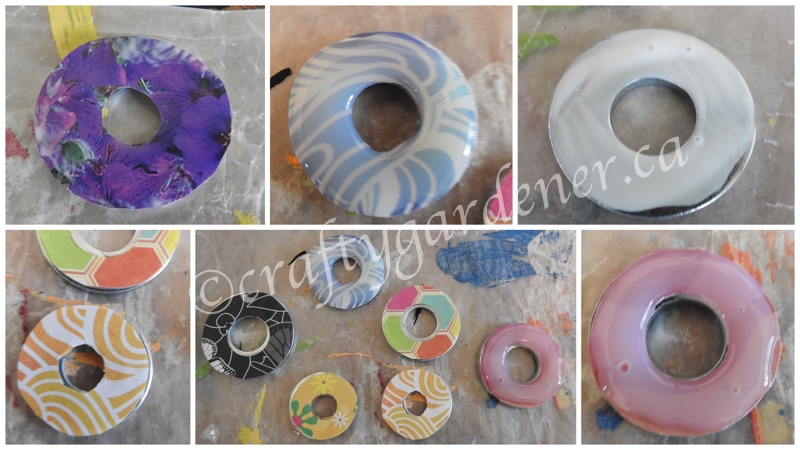
Be sure to trace the outside and the centre hole. If you have a punch that fits the hole you can use it to punch that out. I used an exacto knife and some very sharp scissors. The punch only wanted to work a certain distance from the edge of the paper and it frequently wasn’t centered on the washer circle. Sometimes you have to go back and trim/file off a bit of paper that sticks over the edges.
This paper circle gets glued onto the washer (use white glue or mod podge) and sometimes you need to slide it around a bit so that it fits. Let this totally dry before moving on to the next step which is adding the dimensional adhesive. I purchased Glossy Accents from the Canadian Amazon site.
When the dimensional adhesive is added you just need to add a circle of it close to the centre and a circle closer to the edge. These circles will spread and cover the washer. For those little bits that don’t get covered I used a toothpick and carefully helped to spread it right to the outside. It looks like it has changed the colour of the paper but once it dries it is clear.

The first time I made these I only added paper on one side, but later went back and added paper to the other side. You could use similar paper on both sides or use different colours of paper on each side, then you have a multi-purpose necklace.
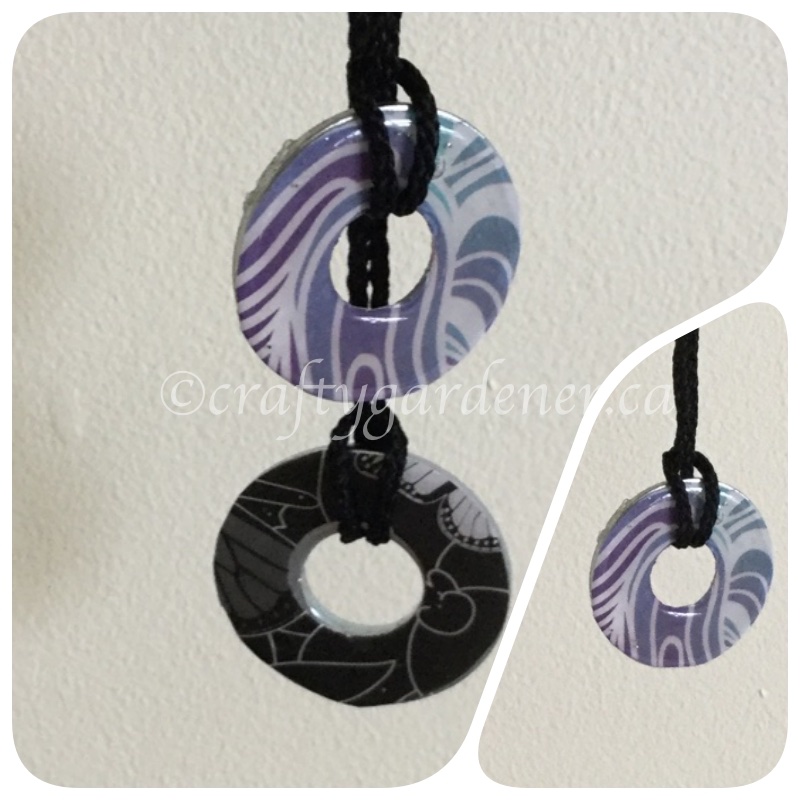
Purchase the cord from the dollar store. It comes in various colours but I chose black as it goes with all colours and outfits. You could choose colours of cord to co-ordinate with your outfit. Cut a length that fits over your head and hangs to a spot you want. Double the cord, tie a knot in one end and poke the loop through the hole in the washer and fasten with a half hitch knot.
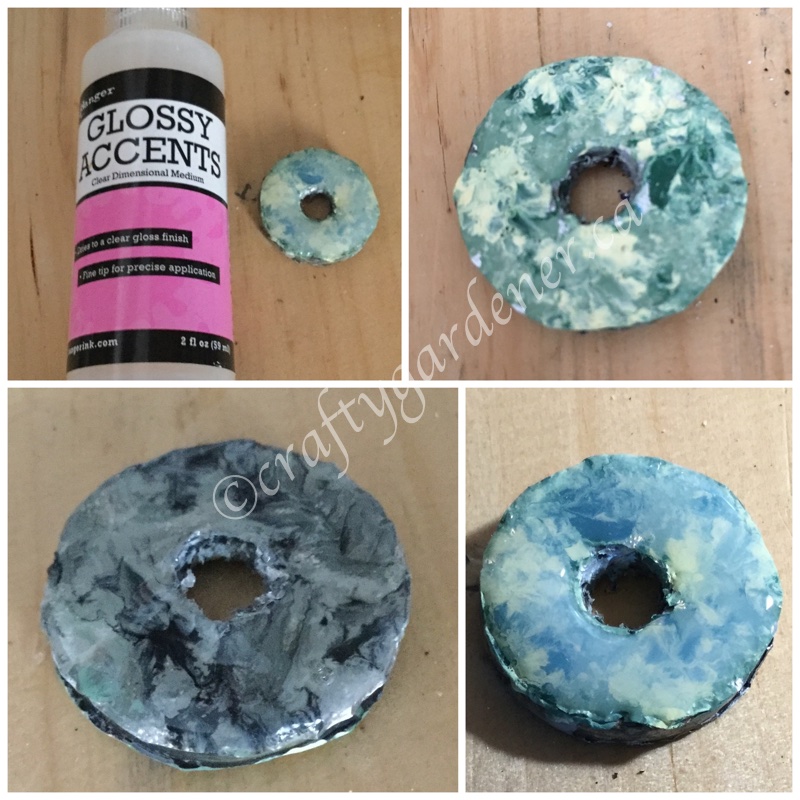
On some other necklaces I used foil top from a coffee pod as it is thicker than kitchen foil instead of paper. Follow the same steps to get your foil circle, then crinkle it all up to add some textures. I then used dabs of acrylic paint on top of the foil and blotted it with a paper towel so it all blended in together. One side of the washer has the black/grey colour and the other side had greens/yellow colour. The photos were taken just after the Glossy Accent was added and you can see they appear opaque. The photo at the top shows the green/yellow side dried and the colours show through.

This is not a sponsored post by Glossy Accents. It is the dimensional adhesive that I chose. Other companies, including Mod Podge, offer a similar product that you can choose if they are available where you live

Lorriel
What a fun idea!
Kea
They’re wonderful! I wouldn’t have had a clue how those were made.
Do you sell some of the things you make at local craft fairs? Just curious!
BTW, I credited your e-friend at Empress of Dirt, and added that if she’d prefer me to remove the photo, I will. (Though who knows how many of that image are on Pinterest now!)
Crafty Gardener
No, I don’t sell anything, make for enjoyment and give with love to family and friends.
Yvette Chilcott
What fun Linda, you’re creative in so many ways. I really like those!
Crafty Gardener
Thanks Yvette. Hope you are keeping well and doing lots of sewing during this nasty winter weather.
Margie
Very cool! Purple is my fave colour so I like the purple ones the best.
Myrtle
I love all the colours that you have done and the necklace look very nice. I wish I had your artistic ability.
Jennifer A. Jilks
Well done! Wait’ll you see my lame Valentine’s decor!!!
Crafty Gardener
At keast you put some up. The washer necklaces woukd be a fun Gramma Camp activity.
Mother of 3
I’ve been wanting to try this craft too! I love the idea of being able to make whatever color/pattern I’d like.
Julie
These turned out great, I especially love the idea of the recycled foil tops. Very cool 🙂
Julie C
Hi Linda, great idea they do look good who would of thought you could make washers look cool. Do you think they would work as a wind chime?
Crafty Gardener
I love the idea of a windchime Julie, will be trying that out.
Chas Greener
I had saw these in a magazine once and saved it. You have reminded me I wanted to try it, I’ll have to get on that with the kids … maybe a winter weekend project 🙂 Thanks for sharing.
Teresa
They turned out beautiful! Thank you for sharing the tutorial at The Really Crafty Link Party. Pinned!
Country Gal
What a great idea , they are all so pretty good idea as gifts to . Thanks for sharing , stay warm and cozy in this crazy arctic weather .
Jessica Rogers
I never thought that a neckless can be made by washers! These look so adorable and beautiful. Thanks a lot for the tutorial, Linda. I will try it at my home.